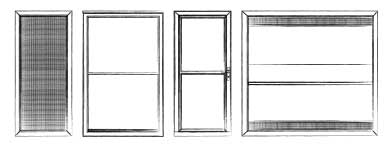
Have you ever wondered how to install a pet door storm door? Instead of cutting into your home's walls, consider a pet door storm door instead. Both beautiful and functional, pets and their owners appreciate the independence this door affords them.
Ask This Old House general contractor Tom Silva helps a homeowner install a storm door with her active dog in mind.
Tim Silva's steps to install a pet door storm door.
Time: 1-2 hours
Skill Level: Moderate
Tools List for Installing a Storm Door with a Dog Door: Drill/Driver Caulking Gun 1/8” drill bit 3/8” drill bit 3/32” drill bit
Shopping List: Storm Door with Dog Door, Caulking
Steps:
1. Measure the door where the storm door will go and be sure to get the right size. In this case, the door is 80” x 36.”
2. Measure to ensure the door is square before you install the storm door. Use the 3-4-5 method to help. The jamb is three feet wide at the top. Use a tape measure to measure down 4 feet. Hold the tape measure at that point and measure at an angle to the top of the jamb. If the measurement is 5 feet, the door jamb is square.
3. The hinge can go on either side, but conventionally the hinge will match the hinge on the current door.
4. Match up the primer hole in the hinge to the hole in the storm door. Use a drill/driver to fasten the first screw in along the hinge.
5. The rest of the holes will need to be drilled first. Use a 1/8” drill bit on a drill/driver to make the holes. Use drill/driver to fasten the remainder of the screws along the hinge.
6. To attach the hinge to the door jamb, push the storm door up flush with the frame and drop it just a touch. Then drill one screw in the middle to fasten the hinge on the outside of the frame and a second on the inside of the jamb.
7. Close the storm door and check to see if it fits.
8. Finish off the screws on the interior of the hinge jamb using a drill/driver.
9. Extend the extension piece at the base of the storm door to ensure it is flush with the threshold.
10. Drill in the remainder of the screws on the exterior of the hinge jamb into the casing.
11. Run a thin bead of caulk along the drip cap for the storm door.
12. Place the drip cap along the top of the storm door and push it flush to the casing.
13. Move the drip cap up just slightly to create an even gap along the top of the storm door.
14. Use a drill/driver to fasten screws along the drip cap.
15. Run a bead of caulking across the top of the drip cap following installation as an added weather barrier.
16. Line up striker side of the storm door jamb to the casing and use a drill/driver to fasten in the screws.
17. Line up hardware so it will not butt up against current hardware on the current door.
18. Line up template with predetermined placement of hardware. Use a 3/8” drill bit to bore out the center hole for the hardware using a drill/driver. Use 1/8” drill bit for the two remaining holes.
19. Attach the hardware using screws and drill/driver.
20. Line up the latch on the jamb to the hardware and use screws and drill/driver to fasten.
21. Attach compressor to either the top or the bottom of the door. Use a drill/driver to fasten the hook to the jamb.
22. Use a 3/32” drill bit to bore out holes in the base or top of the door. Use these holes to attach the compressor to the storm door with a drill/driver and screws. Install the adjustable sweep at the bottom to keep drafts out.
Follow This Old House for more home rennovation ideas.
Facebook: https://www.facebook.com/ThisOldHouse
Instagram: https://www.instagram.com/thisoldhouse
Twitter: https://twitter.com/ThisOldHouse
Tumblr: http://thisoldhouse.tumblr.com/
.png?width=800&height=202&name=Logo_Larson_Script_95k%20(1).png)


 CHAT WITH US
 888.483.3768