So, you’ve decided to DIY your storm door project? We’re here to guide you through the installation of a Larson EasyHang fullview storm door. We know your time is valuable, so we’ve provided a comprehensive list of all the tools and materials you need up front, helping you avoid unnecessary trips for supplies. Our detailed instructions come in both written and video formats to accommodate various learning preferences, helping you tackle your project with ease.
After you find the right storm door, be sure to check the installation instructions that come with it, as steps may vary.
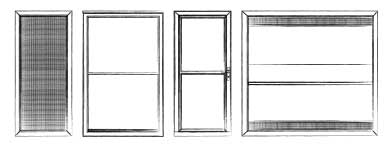
Preparing for Storm Door Installation
Before diving into the installation, it’s essential to gather all the necessary tools and materials. You’ll need:
- Tape measure
- Drill
- Impact driver
- Drill bit set
- #2 Philips screwdriver
- Flathead screwdriver
- 8-inch level
- Safety glasses
- Cut-resistant gloves
- Caulk gun with sealant
- Shims
- Scissors
- Pencil
- Tape
- Sawhorses
- Step ladder
- A second person to help as needed
Step 1: Choose the Handing
Your EasyHang storm door is designed for either right- or left-hand installation. Confirm which side of the storm door will be the hinge side (left or right), as viewed from the exterior. Typically, the storm door hinges will be on the same side as primary door hinges.
Step 2: Measure Your Doorway
Accurate measurements are crucial for a proper fit. Before purchasing, measure the width and height of your doorway to ensure it matches the dimensions of the desired storm door.
To find the width, measure horizontally inside the brickmould at the top, middle, and bottom of the opening. (This is where the storm door mounting rails will be installed.) Record the narrowest of these measurements as your width. For height, measure from the threshold where the storm door will sit to the top and record this as your height. Next, measure diagonally from the lower left-hand corner to the upper right-hand corner and from the lower right-hand corner to the upper left-hand corner. These measurements should be within 1/8 inch of each other. Verify that the mounting surface area is one inch wide by one inch deep. Hinge side shimming may be necessary to fit the existing opening, so use an appropriate shim thickness to reduce the opening size.


Step 3: Prepare the Exterior Door Trim
A clean and smooth exterior door trim is essential for a secure fit. Clean the door frame thoroughly, removing any debris or old caulk. If the frame is damaged, repair it before proceeding. This step ensures your new storm door fits perfectly and operates smoothly.
Step 4: Set Placeholder Screws
Place the hinge rail against the door frame and slide it to the top. Mark the first hole from the top with a pencil, then remove the hinge rail. Pre-drill a 1/8-inch hole and install the place holder screw, leaving 1/8 inch of screw threads exposed.
Step 5: Attach the Hinge Rail
Place the storm door on sawhorses with the interior side facing up. With a helper, align the top hinge rail hole with the top pre-drilled hole on the hinge side of the door and loosely attach it with a hinge rail screw. Ensure no hinge leaves are folded under the door, then repeat this for the bottom hinge hole. Starting from one end, press each hinge leaf into the door until you hear it click into place. Drill six 1/8-inch pilot holes for the remaining hinge holes on the hinge rail and remove any metal shavings. Finally, slide the rail extender into the bottom of the hinge rail.


Step 6: Hang the Door
With the hinge rail in place, it’s time to hang the door. Hang the storm door onto the exterior door trim using the placeholder screw from Step 4. Adjust the hinge rail so the screw is in position; the door will drop approximately 1/16 inch. While pushing the hinge rail tight against the exterior trim, tighten the screw without overtightening.
Next, press the hinge rail against the trim and pre-drill a 1/8-inch hole through the hinge rail's round hole near the second hinge from the bottom. Install a screw. Slide the rail extender down to the door threshold using a screwdriver. Pre-drill six 1/8-inch holes through all remaining round and pre-hang holes in the hinge rail and install screws. Finally, pre-drill five 1/8-inch holes through the hinge rail's exterior holes and install screws.
Step 7: Install the Drip Cap
Using a step ladder, position the drip cap on the exterior door trim above the storm door. Close the storm door to ensure consistent clearance between the door and the drip cap. Align the end of the drip cap with the end of the hinge rail and mark the holes. Pre-drill 1/8-inch holes through the drip cap into the marked spots and install the drip cap with screws. For added weather protection, caulk around the drip cap with a high-quality hybrid polymer, elastomeric or polyurethane sealant.
Step 8: Install the Latch Rail
Slide the right rail extender into the bottom of the latch rail and press the latch rail tightly against the drip cap. Slide the right rail extender down to the door threshold, aligning the outside edge of the latch rail with the outside edge of the drip cap. Ensure the storm door closes freely without hitting the latch rail.
Starting at the top and working down, pre-drill five 1/8-inch holes through all latch rail holes and secure with screws. Use scissors to cut the extender weatherstrip to length. Peel the adhesive backing and install it on the right and left rail extenders as shown.
Step 9: Install the Handleset
Some Larson storm doors include handlesets, while others require a QuickFit Handleset (sold separately). Be sure to follow the instructions provided with the handle you choose.
Step 10: Attach the Storm Door Expander
Open the storm door and slide the expander onto the bottom edge with the holes facing inside. Push it flush against both sides of the door and slide it all the way up. Close the storm door and adjust the expander until it is centered and the sweep lightly touches the door threshold.
Using the taped 3/32-inch drill bit, pre-drill two vertical holes in the expander slots, ensuring not to drill through the door. Secure the expander to the storm door with screws.

Step 11: Screw Cover Installation
Snap screw cover strips into place by anchoring the outer side into the channel first, then working from one end to the other, slide your finger down the strip while pressing. (Screw covers may need to be cut to fit.) NOTE: Straight leg towards outside of rail.


Step 12: Attach the Closer
The door closer helps control the speed at which the door closes, preventing it from slamming shut. Follow the closer instructions, some models come with two closers and some models come with one closer.
Step 13: Final Adjustments
Adjust the closer speed by turning the adjustment screw clockwise to slow the closing speed or counterclockwise to increase it. Make small adjustments and test the door until the desired speed is achieved.
Replacing your Larson storm or screen door is a manageable DIY project that can boost both the look and functionality of your home. By following these steps and using the right tools, you’ll have a beautiful, quality Larson storm door that will protect your home year-round. Keep in mind that installation steps can vary between different Larson storm doors. For more details and to purchase, visit Lowes.com.


 CHAT WITH US
 888.483.3768